Bird Species Identification
Getting started with bird species identification is essentially the practice of learning to see the natural world in sharper detail. You don't need expensive equipment to begin noticing the subtle differences between the creatures sharing your local environment.
Most experts suggest starting with common local species rather than rare sightings. As of 2026, many regional wildlife agencies, such as the U.S. Fish and Wildlife Service, provide digital checklists that help beginners document their observations.
Using these resources builds a strong foundation for your journey.
Quick Answer
Bird species identification requires observing size, shape, and unique plumage patterns. Start by noting the silhouette and flight behavior of the bird. Use local range maps to confirm which species belong in your region.
Consult reputable field guides to verify your initial findings. Document the habitat and time of day for better accuracy.

The Art of Seeing: Why Your Eyes Beat Your Guidebook
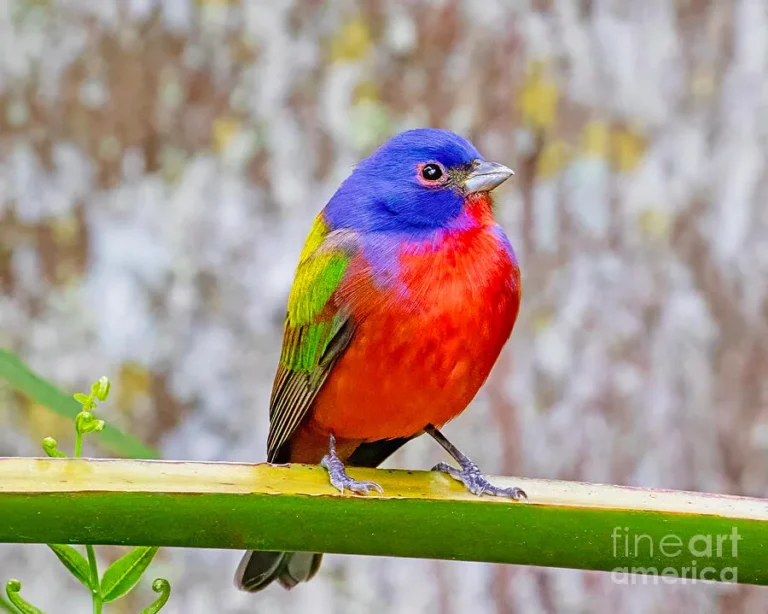
Many beginners make the mistake of focusing on color first when trying to identify a bird. Bright red or vibrant blue feathers often distract the eye from the structural details that actually define a species. A bird in deep shadow might look entirely black, making color-based identification nearly impossible.
In our research, we find that the most accurate birders prioritize the overall structure of the bird. They look at the posture, the length of the tail, and the thickness of the body. These physical traits remain constant regardless of the lighting conditions.
When you remove color from your mental checklist, you start seeing the gestalt of the bird. This is the big picture or the overall impression a bird leaves on you. You will soon realize that even a bird seen in silhouette becomes identifiable through its shape alone.
Master the GISS Method: Identifying Birds by Shape and Motion
GISS stands for General Impression of Size and Shape. It is a fundamental technique for any birder looking to narrow down a species before flipping through a field guide. This method relies on assessing the bird’s physical architecture rather than its pigment.
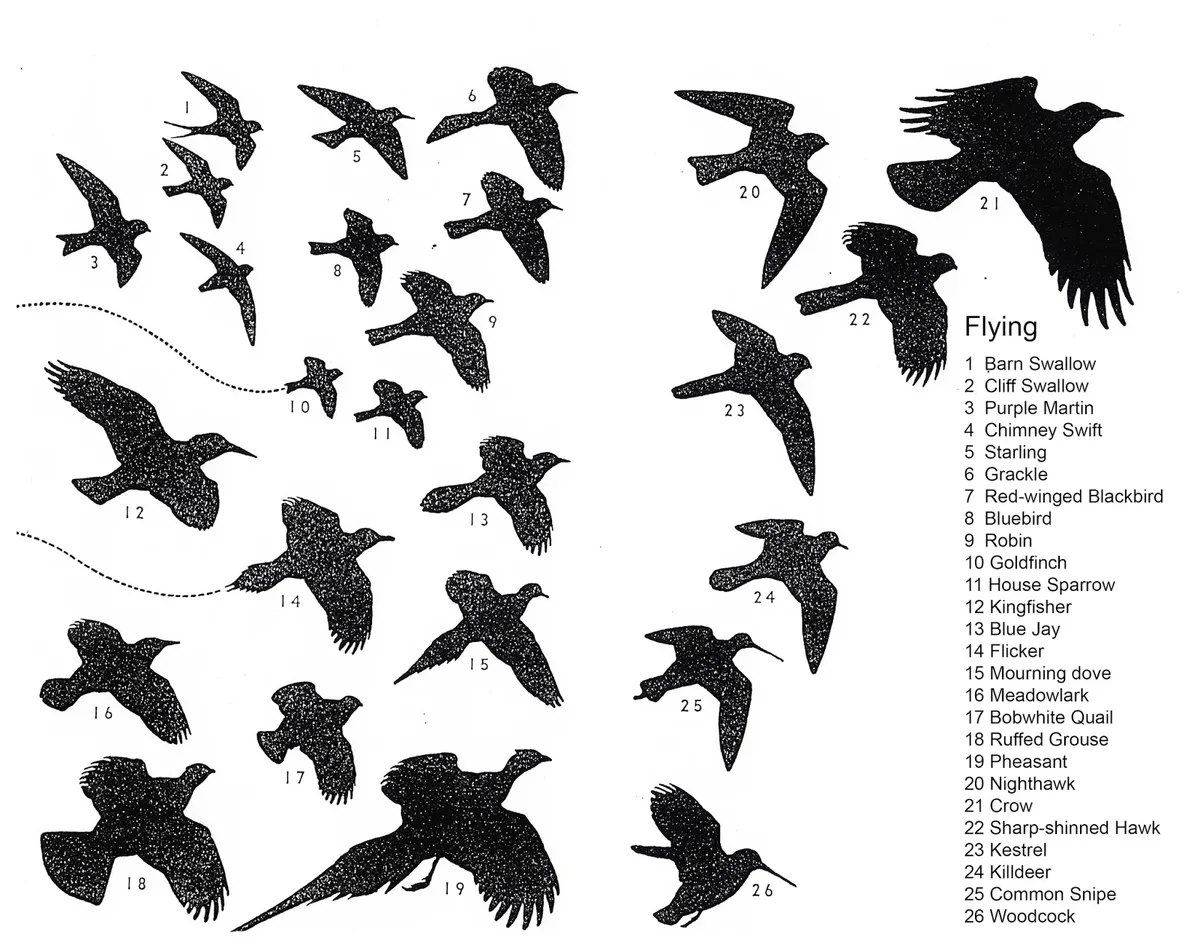
- Silhouette: Observe if the bird is bulky, slender, or round.
- Beak Morphology: Note if the beak is short and conical, long and thin, or hooked.
- Flight Pattern: Look for movements like bounding, soaring, or steady, direct flapping.
Think of this like recognizing a friend from across a crowded room. You don't need to see their specific clothing to know who they are, because you recognize their build and the way they walk. You are training your brain to perform the same task with avian silhouettes.
If the bird is hopping on the ground, check if it flicks its tail or bobs its head while it moves. These tiny, repetitive actions are often the most reliable way to distinguish between similar-looking species. Practice this by observing common birds in your yard until the behavior becomes familiar.
Deciphering Field Marks: Moving Beyond Color and Pattern
Field marks are specific, high-contrast visual cues that act as a signature for a species. These aren't just colors, but patterns that remain stable across the species population. Look for patches of color that appear in specific locations, such as the wings, throat, or around the eyes.
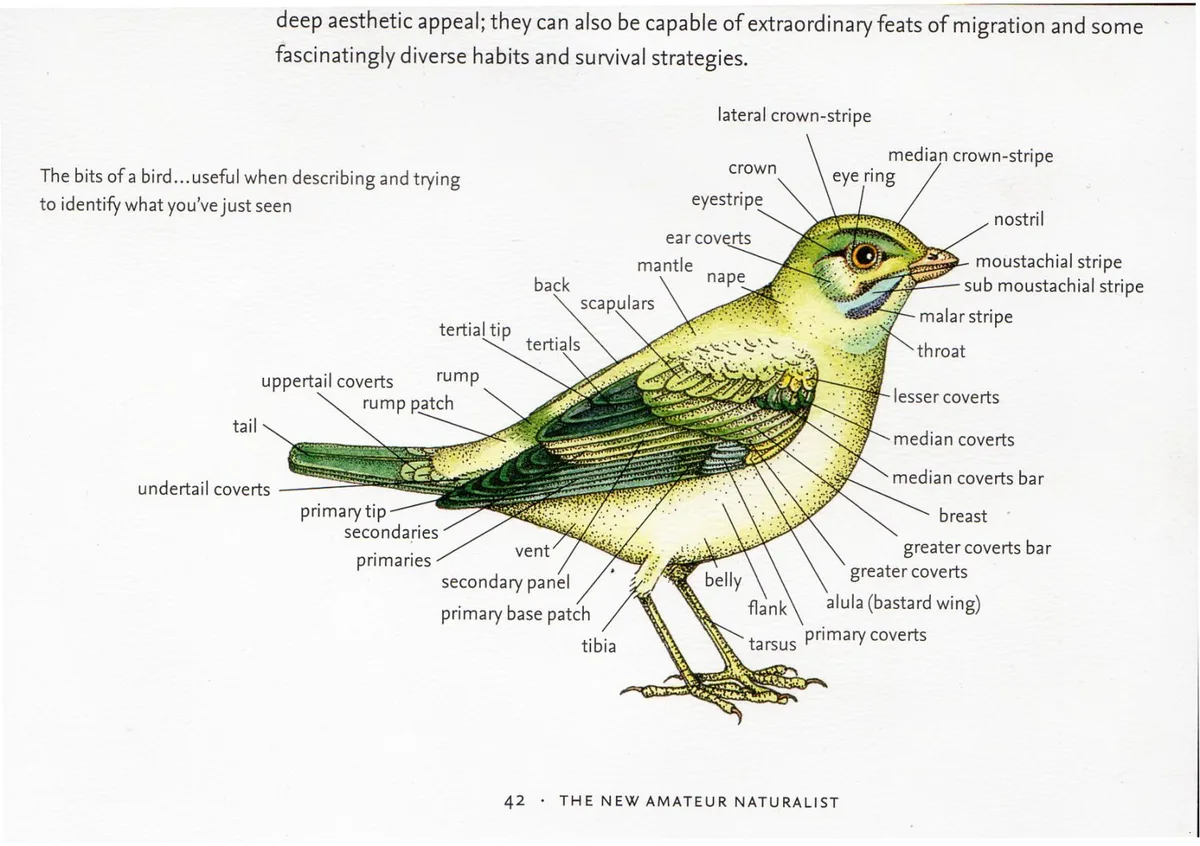
Common field marks you should look for include:
- Wing Bars: Lines of contrasting color running across the folded wings.
- Eye Rings: Distinct rings of white or colored feathers surrounding the eye.
- Supercilium: A stripe of color that runs above the eye, often called an eyebrow.
- Malar Stripe: A line extending down from the base of the bill along the cheek.
The Cornell Lab of Ornithology emphasizes that these marks provide the definitive evidence needed to confirm an ID. When you spot one of these features, compare it against your regional guide to verify your observation. Don't worry if you miss a mark on your first attempt.
It takes time to train your eyes to notice these small details.
Behavioral Cues and Habitat: The Contextual Approach to Identification
Habitat serves as your first major filter when identifying a bird. A species that lives in deep, dense forest is rarely found in an open, grassy field. By knowing which species are common to your specific environment, you can instantly rule out dozens of incorrect possibilities.
Consider these environmental factors to narrow your search:
| Habitat Type | Typical Behaviors |
|---|---|
| Wetland | Probing mud, swimming, wading |
| Forest Canopy | Climbing, flitting, hanging upside down |
| Grassland | Running on ground, short hopping |
| Suburban | Perching on wires, feeder activity |
Behavioral context often involves the time of day and the season as well. Some birds are strictly nocturnal, while others only show up during specific migration windows. If you see a bird that seems out of place, check if it is a seasonal migrant passing through your area.
Always match the behavior to the physical anatomy. A bird with a thin, probing beak will naturally be seen near water or within soft soil. A bird with a sturdy, cone-shaped beak will likely be found near seed-bearing plants or bird feeders.
Avoiding Common Pitfalls: Why You Are Misidentifying That Bird
The most common error in bird species identification is the confirmation bias trap. This happens when you decide what a bird is before you have finished observing it. You see a brown bird and assume it is a sparrow because you saw one earlier, ignoring features that point elsewhere.
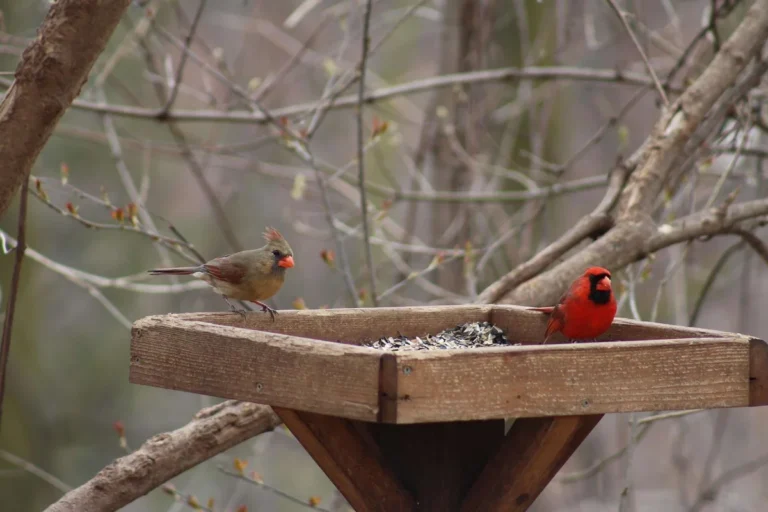
Another frequent mistake is failing to account for sexual dimorphism. In many species, the male and female look like entirely different birds. Always check your guide for both versions of the species to ensure you aren't ignoring half the population.
- Juvenile Plumage: Young birds often look significantly different from their parents.
- Seasonal Molt: Many birds change their colors dramatically between breeding and winter seasons.
- Lighting Illumination: Direct sunlight can make a dull-colored bird appear bright, leading to false IDs.
If you are struggling with a difficult identification, don't force a result. It is better to label a sighting as unidentified than to log an incorrect species. As you gain experience, you will naturally start to notice the subtle differences that currently seem invisible to you.
Essential Gear and Digital Tools for Field Identification
Reliable optics are the single most useful tool for clarifying the details needed for an accurate ID. Manufacturer specifications generally indicate that 8×42 binoculars offer the best balance of magnification and light-gathering capability for most field conditions. The 8 refers to the magnification power, while 42 is the objective lens diameter in millimeters.
Digital tools have changed how we document and share findings. Platforms like eBird allow you to record your sightings and compare them against regional data collected by other birders. This acts as a real-time check on whether a species is expected in your current area based on historical trends.
If you prefer a physical reference, choose a regional field guide that focuses exclusively on your specific continent. These guides organize birds by family, making it easier to compare similar species side-by-side. Always keep your guide and a small notebook in your pack to record behaviors that you can't capture in a single sketch.
Consider these gear tips for a successful outing:
- Lens Cleaning: Keep a microfiber cloth handy to prevent blur caused by dust or smudges.
- Strap Comfort: Use a chest harness for binoculars to reduce neck strain during long days in the field.
- Weather Prep: Ensure your optics are fog-proof and waterproof to handle changing climate conditions.
Frequently Asked Questions
How do I know if a bird is a rare species or just a juvenile?
Check your field guide’s section on juvenile plumages first. Young birds often appear streaky or lack the vibrant colors of adults, which can lead to misidentification. If the bird still looks nothing like your guide, check local eBird records to see if the species is documented in your area.
What should I do if I cannot identify a bird after ten minutes?
Stop trying to find a name and start writing down what you see. Focus on the shape, tail length, and specific behaviors like feeding style or flight pattern. Sometimes the best birding sessions are the ones where you simply observe a species without needing to label it immediately.
Why do some birds look different in the winter?
Many birds go through a seasonal molt that replaces bright, breeding-season feathers with duller winter plumage. This helps them stay camouflaged when they aren't trying to attract a mate. Always check the winter plumage plates in your field guide to see if the bird's appearance changes throughout the year.
Is using bird-call apps ethical for identification?
Using apps to play bird calls can be stressful for birds if used during nesting season or in high-traffic areas. Use them sparingly and keep the volume low to avoid disrupting natural behaviors. Never use recordings to lure birds closer for a photo or a better look.
How do I start identifying birds by their songs?
Focus on learning the calls of the five most common birds in your neighborhood. Once you can identify these reliably, add one new species to your list each week. Listening to recordings on educational websites can help you associate specific songs with the birds you see in your yard.